Live Web Final Project Proposal

For my final I am thinking about pursuing two different ideas which I am going to explain deeper in detail:

1. PT live video interface to guide and encourage patients to do their exercises

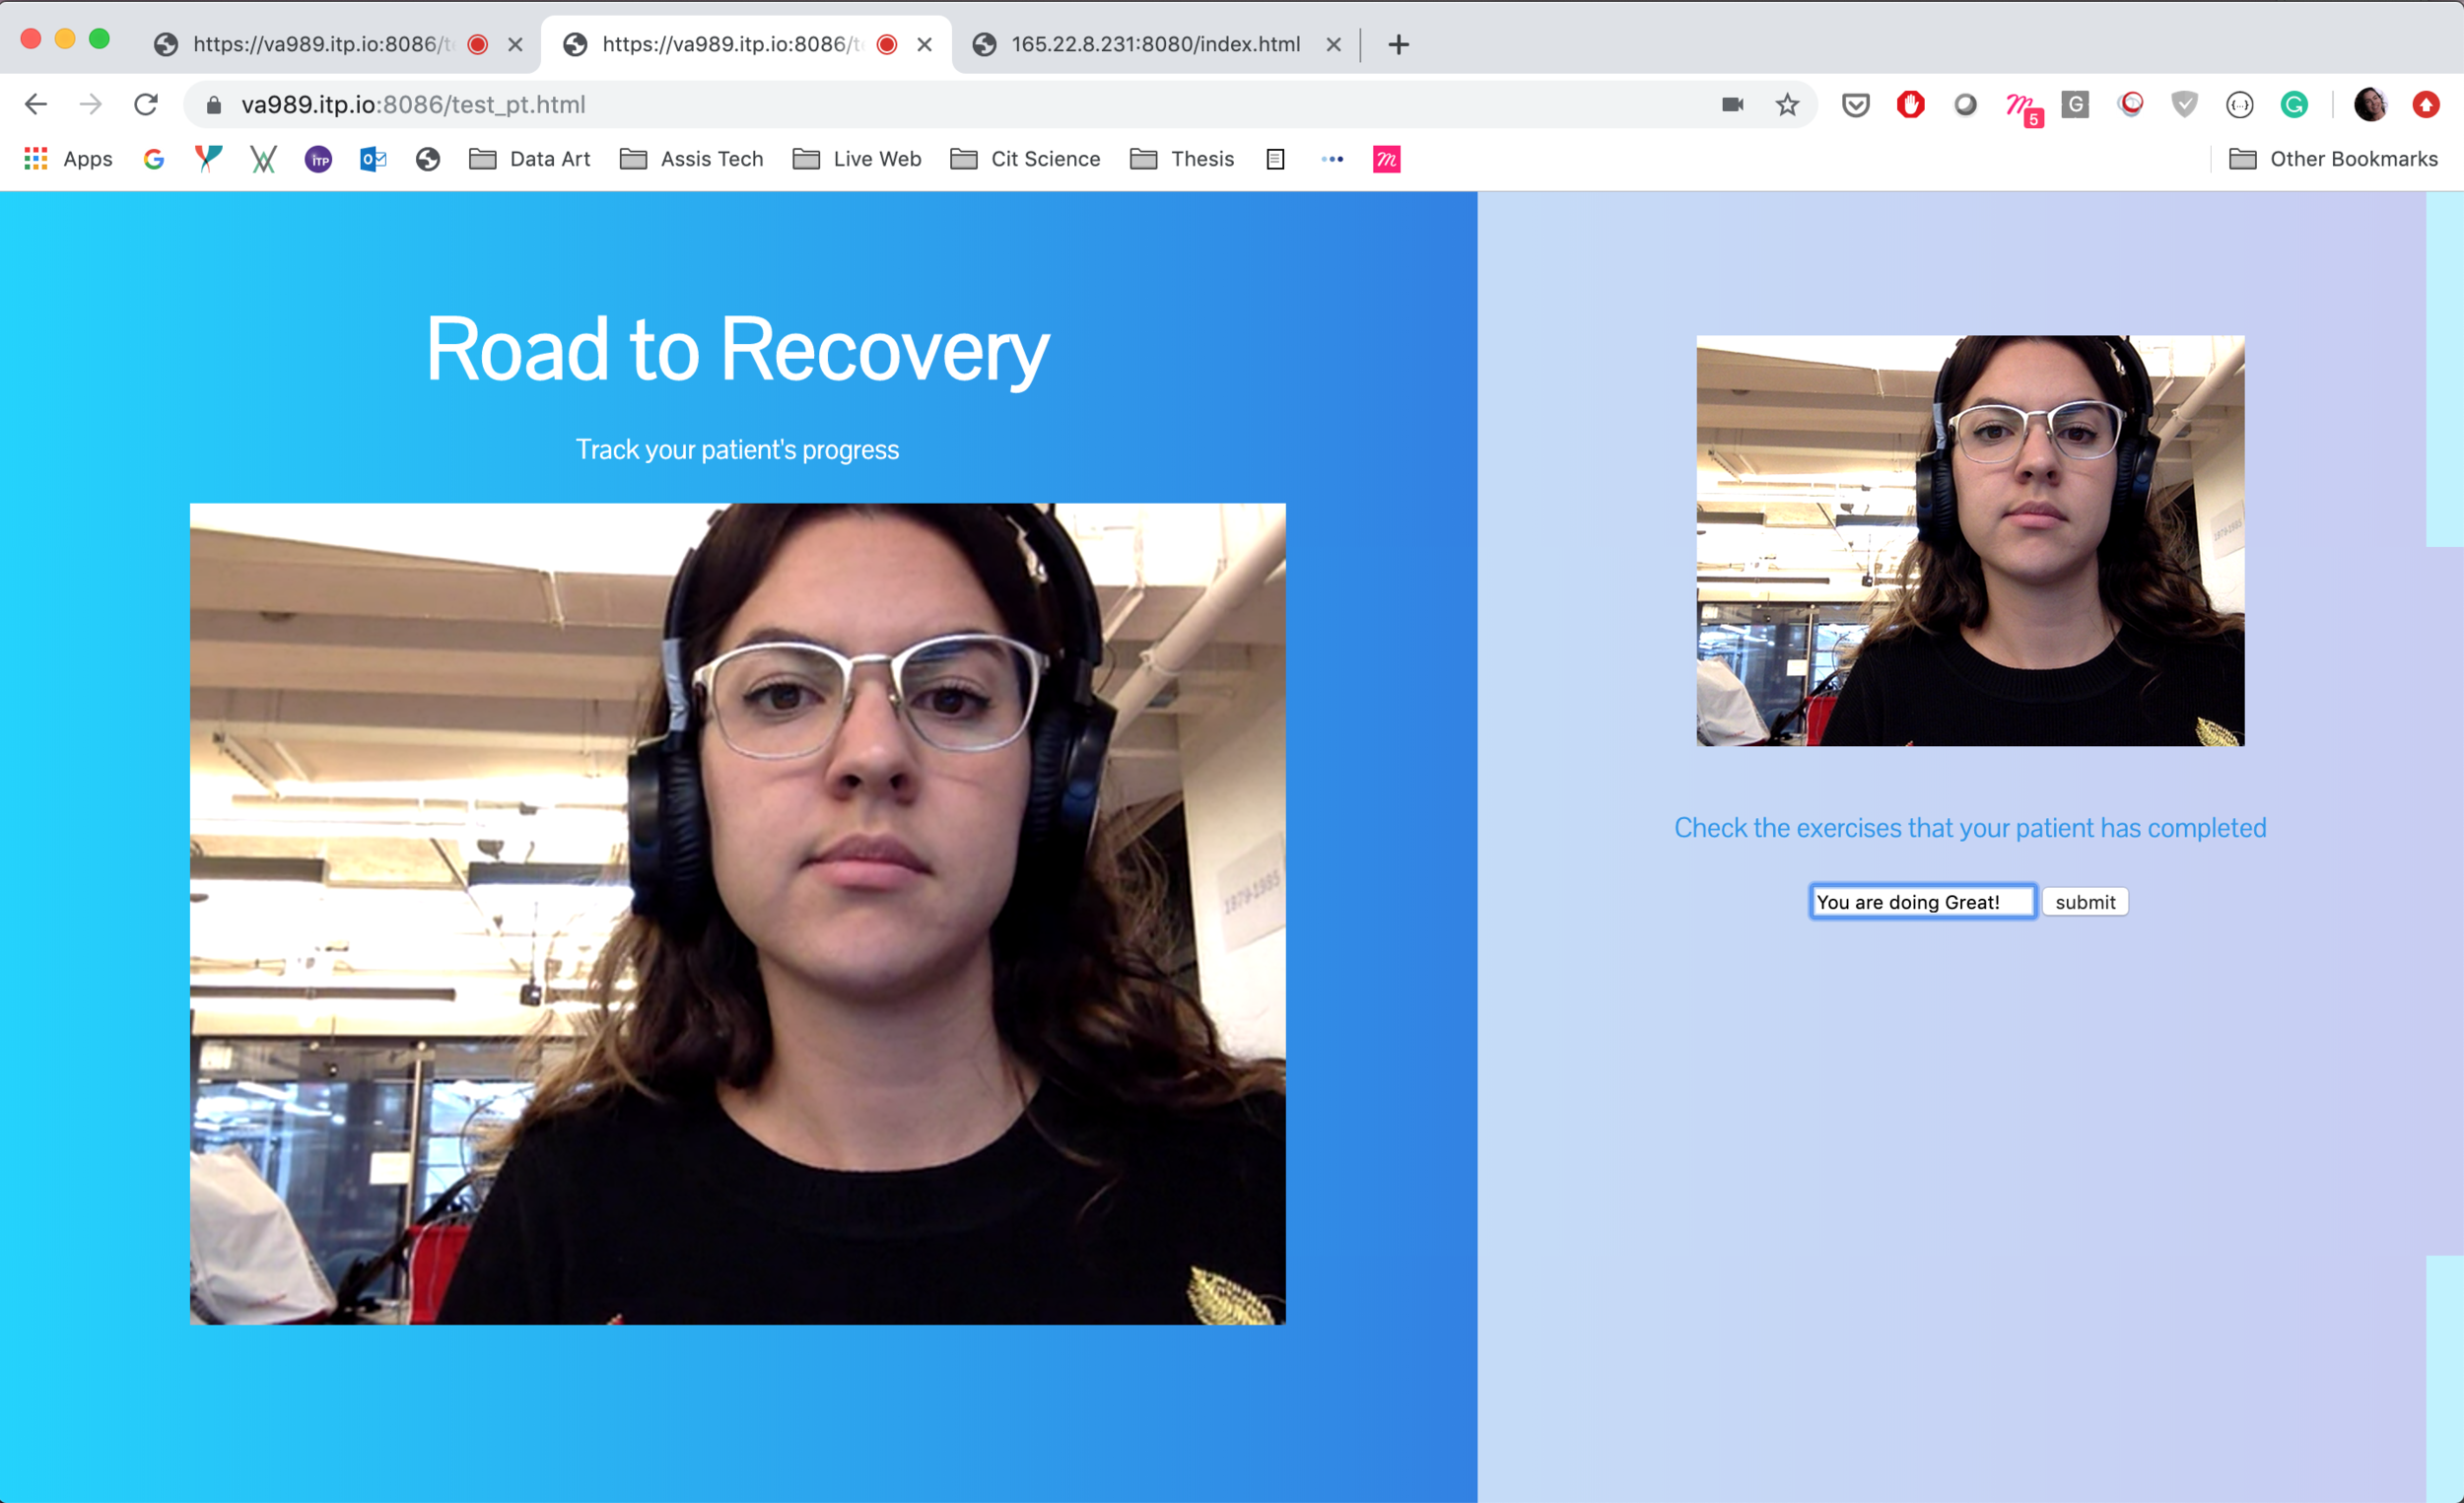
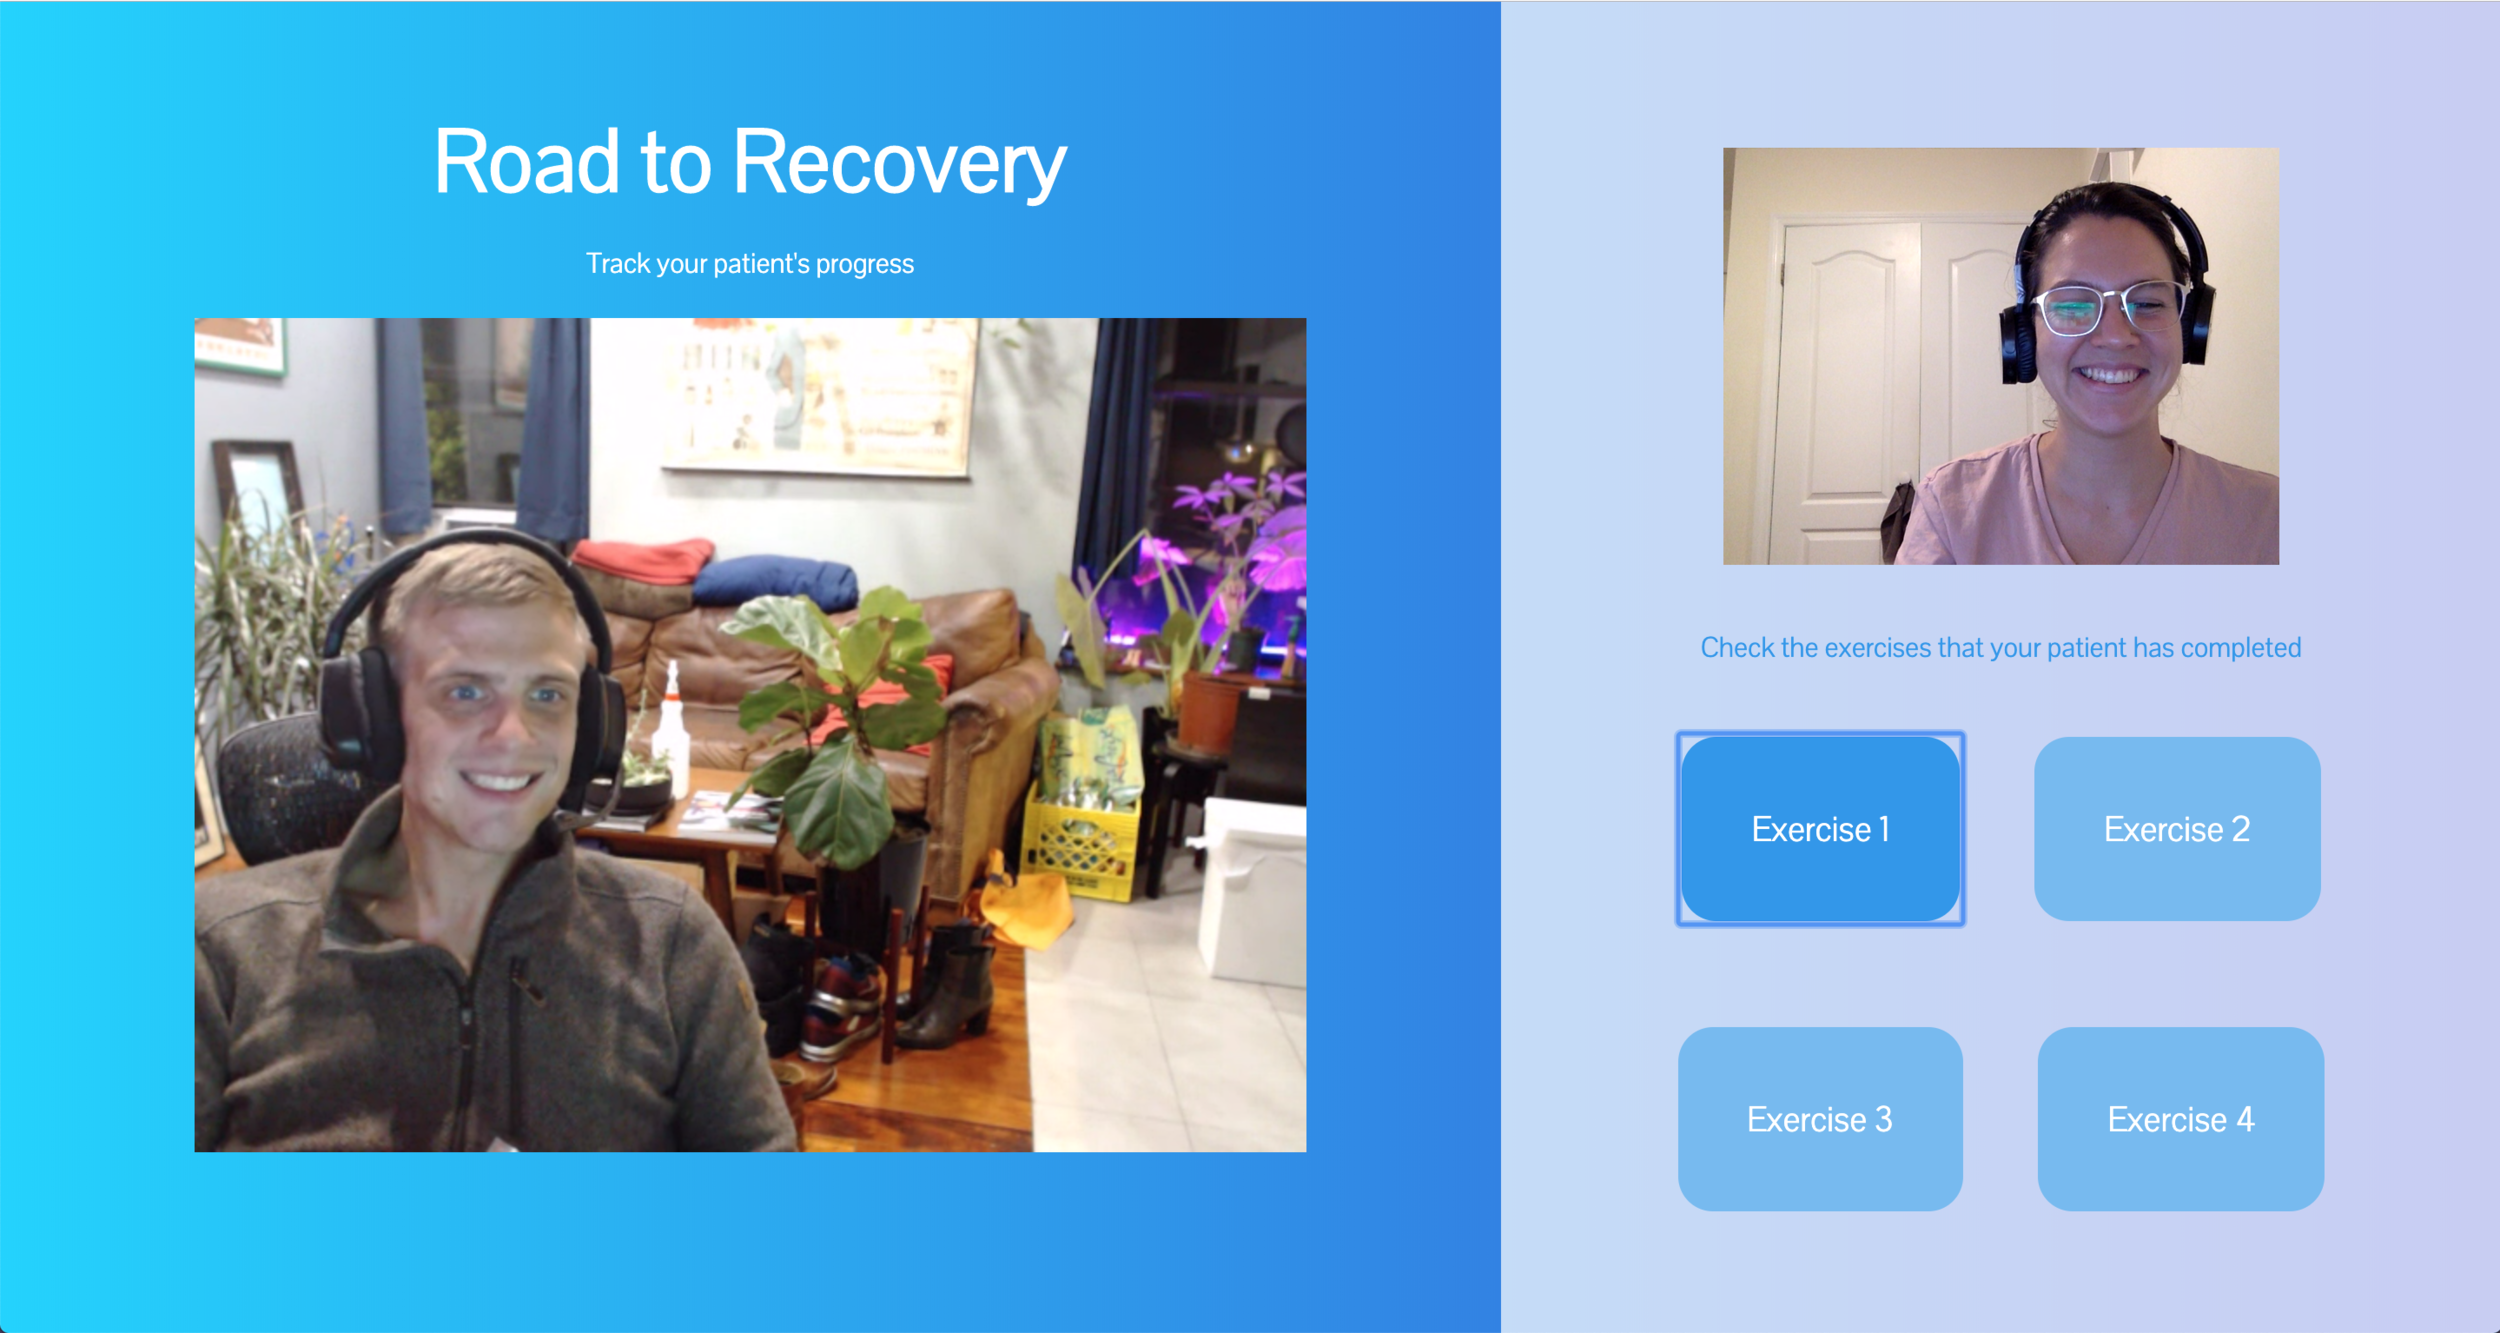
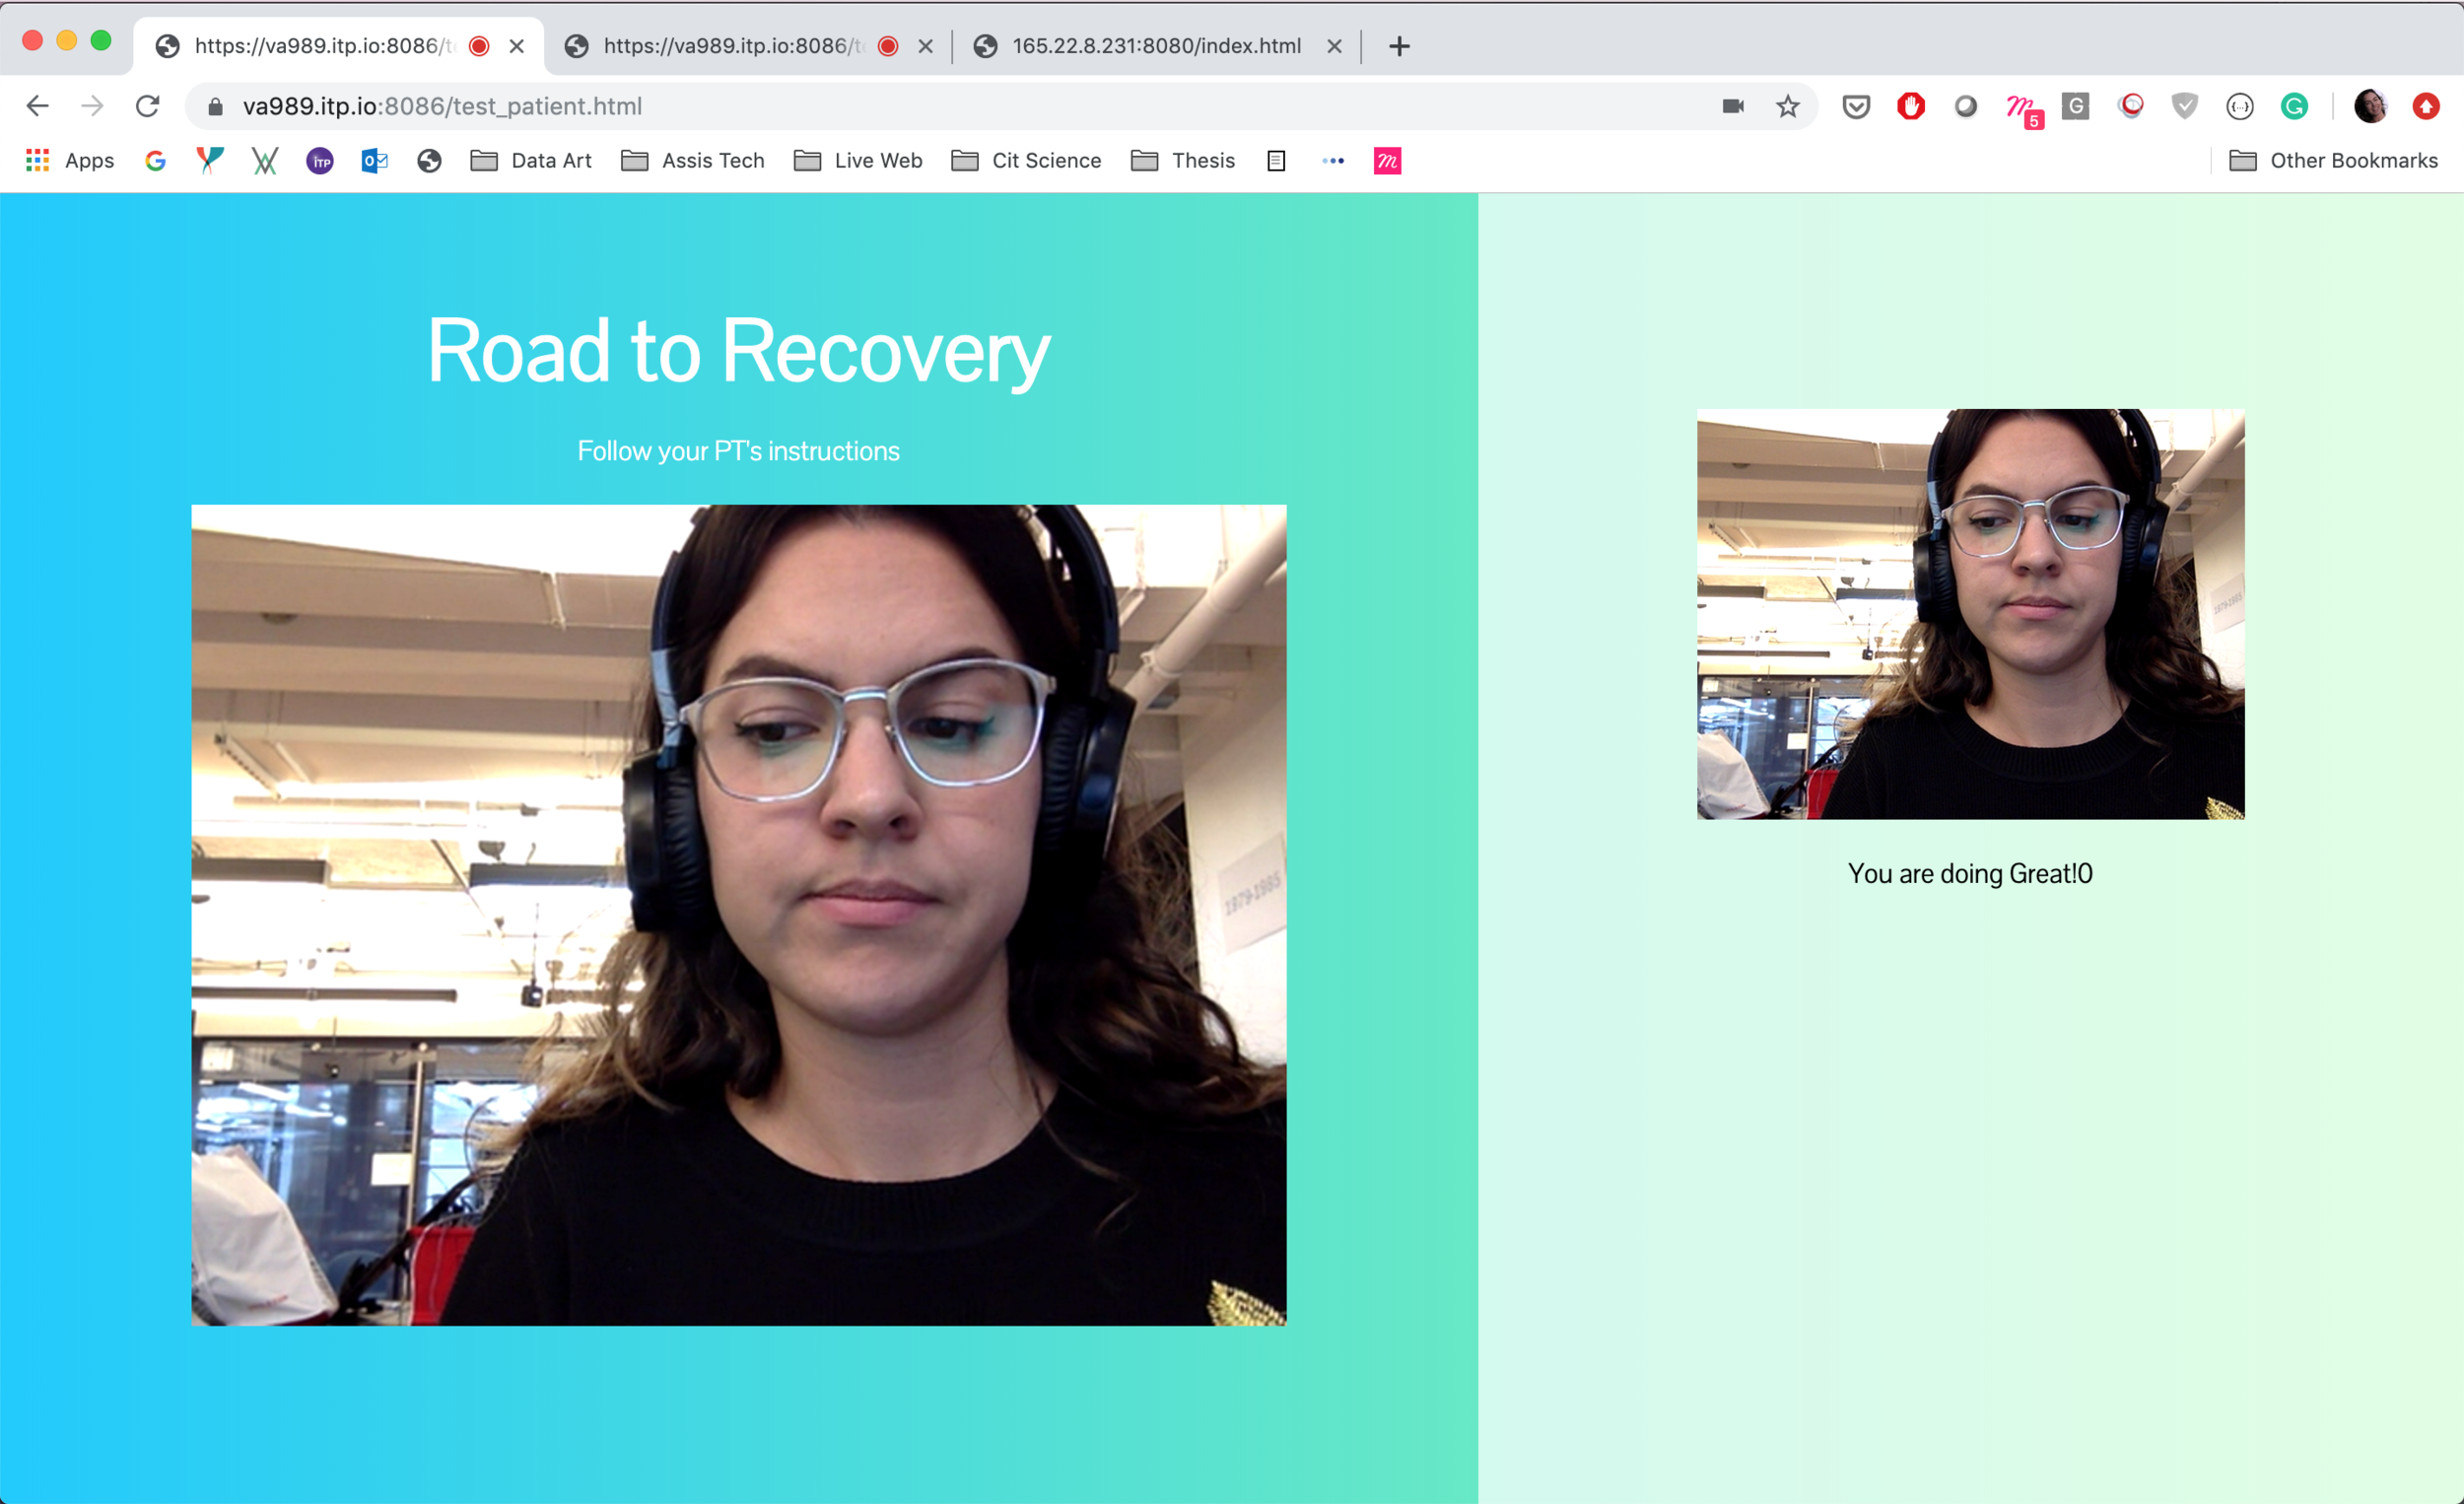
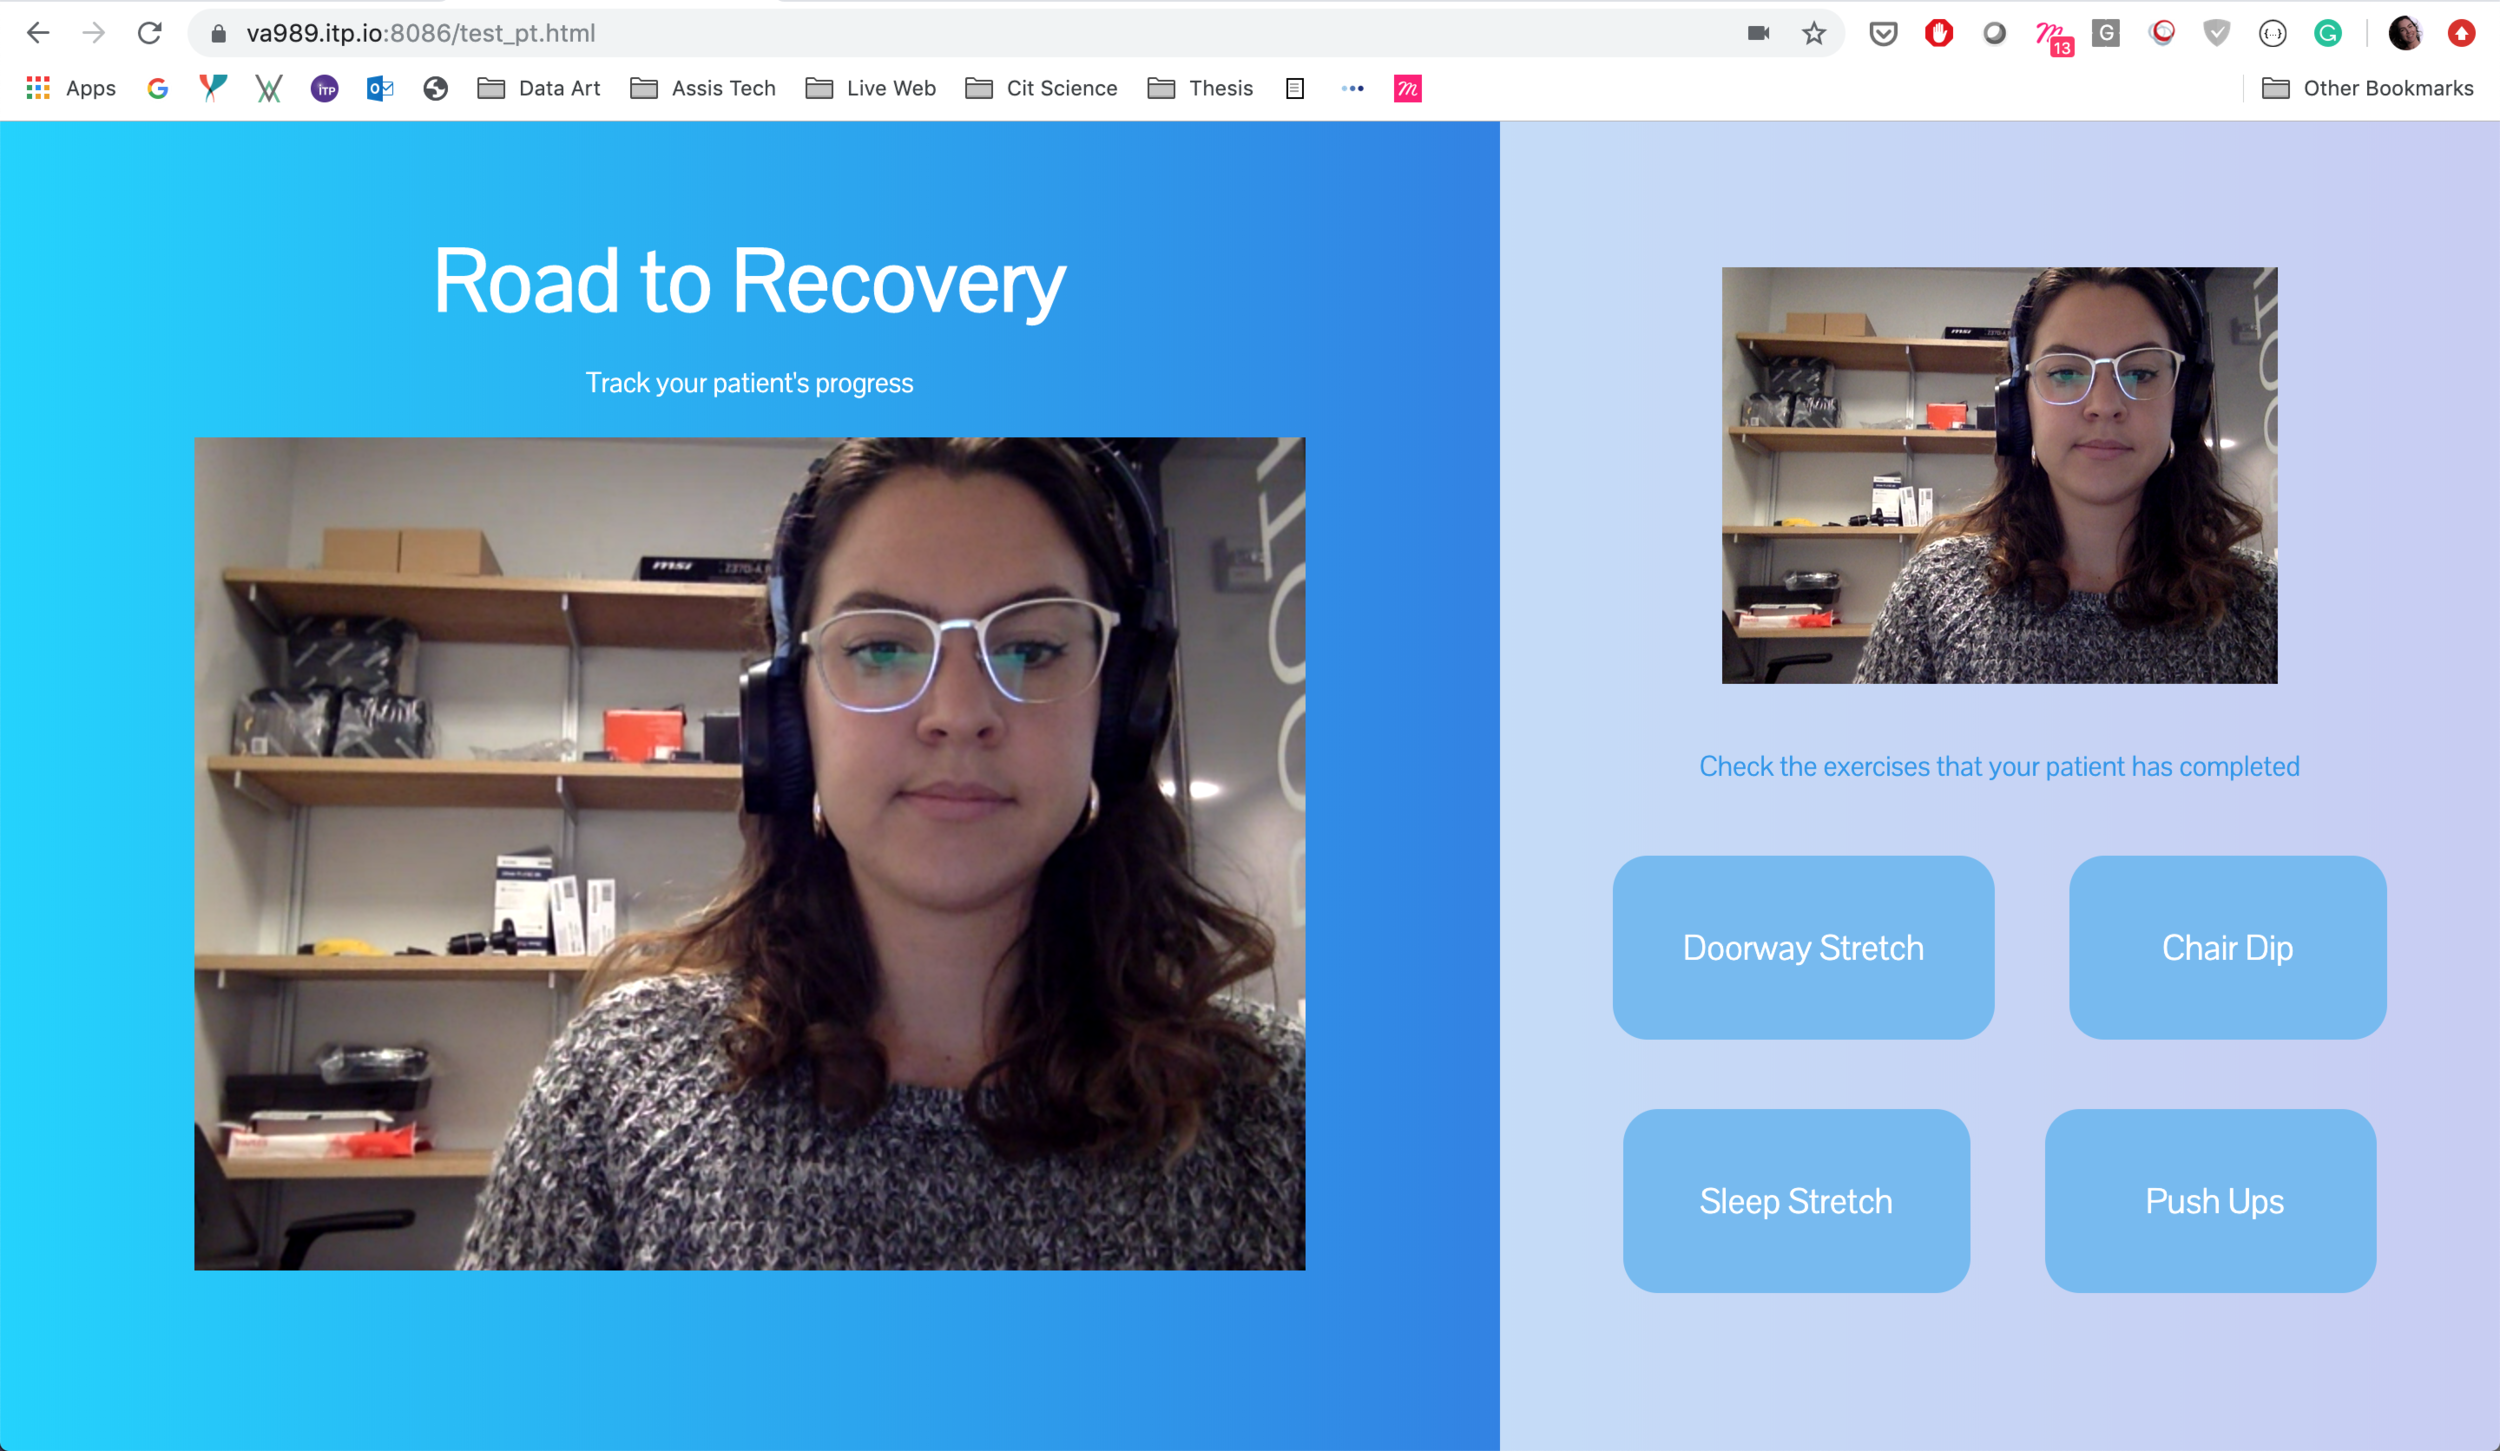
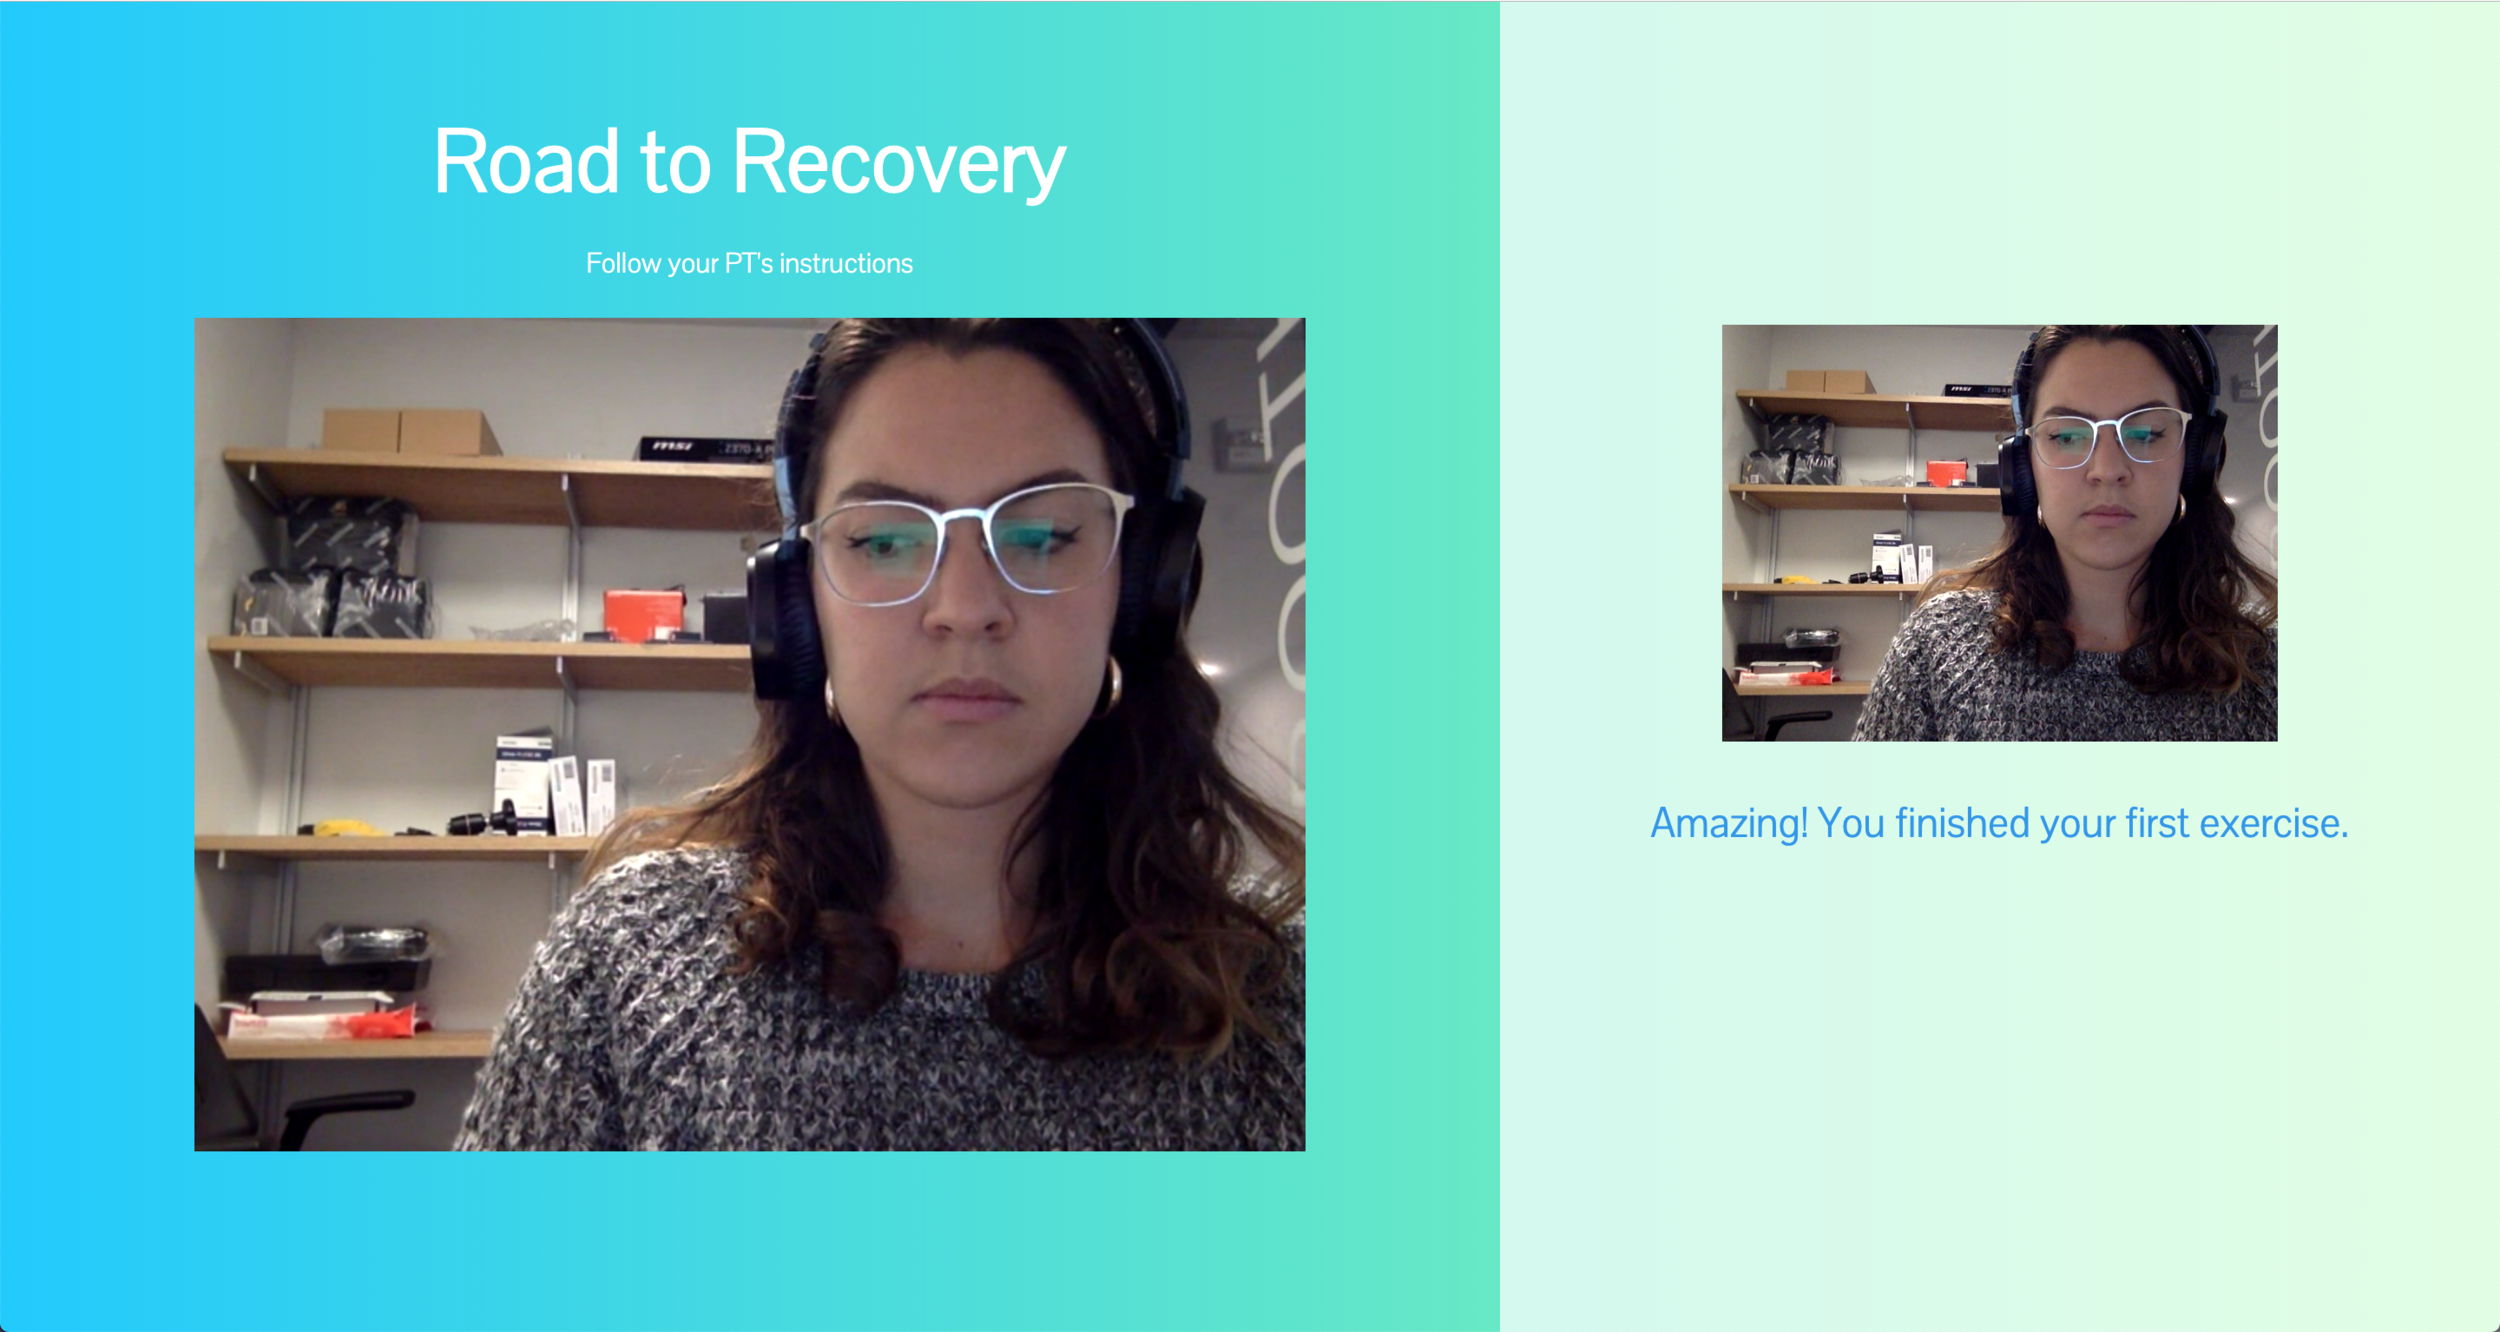
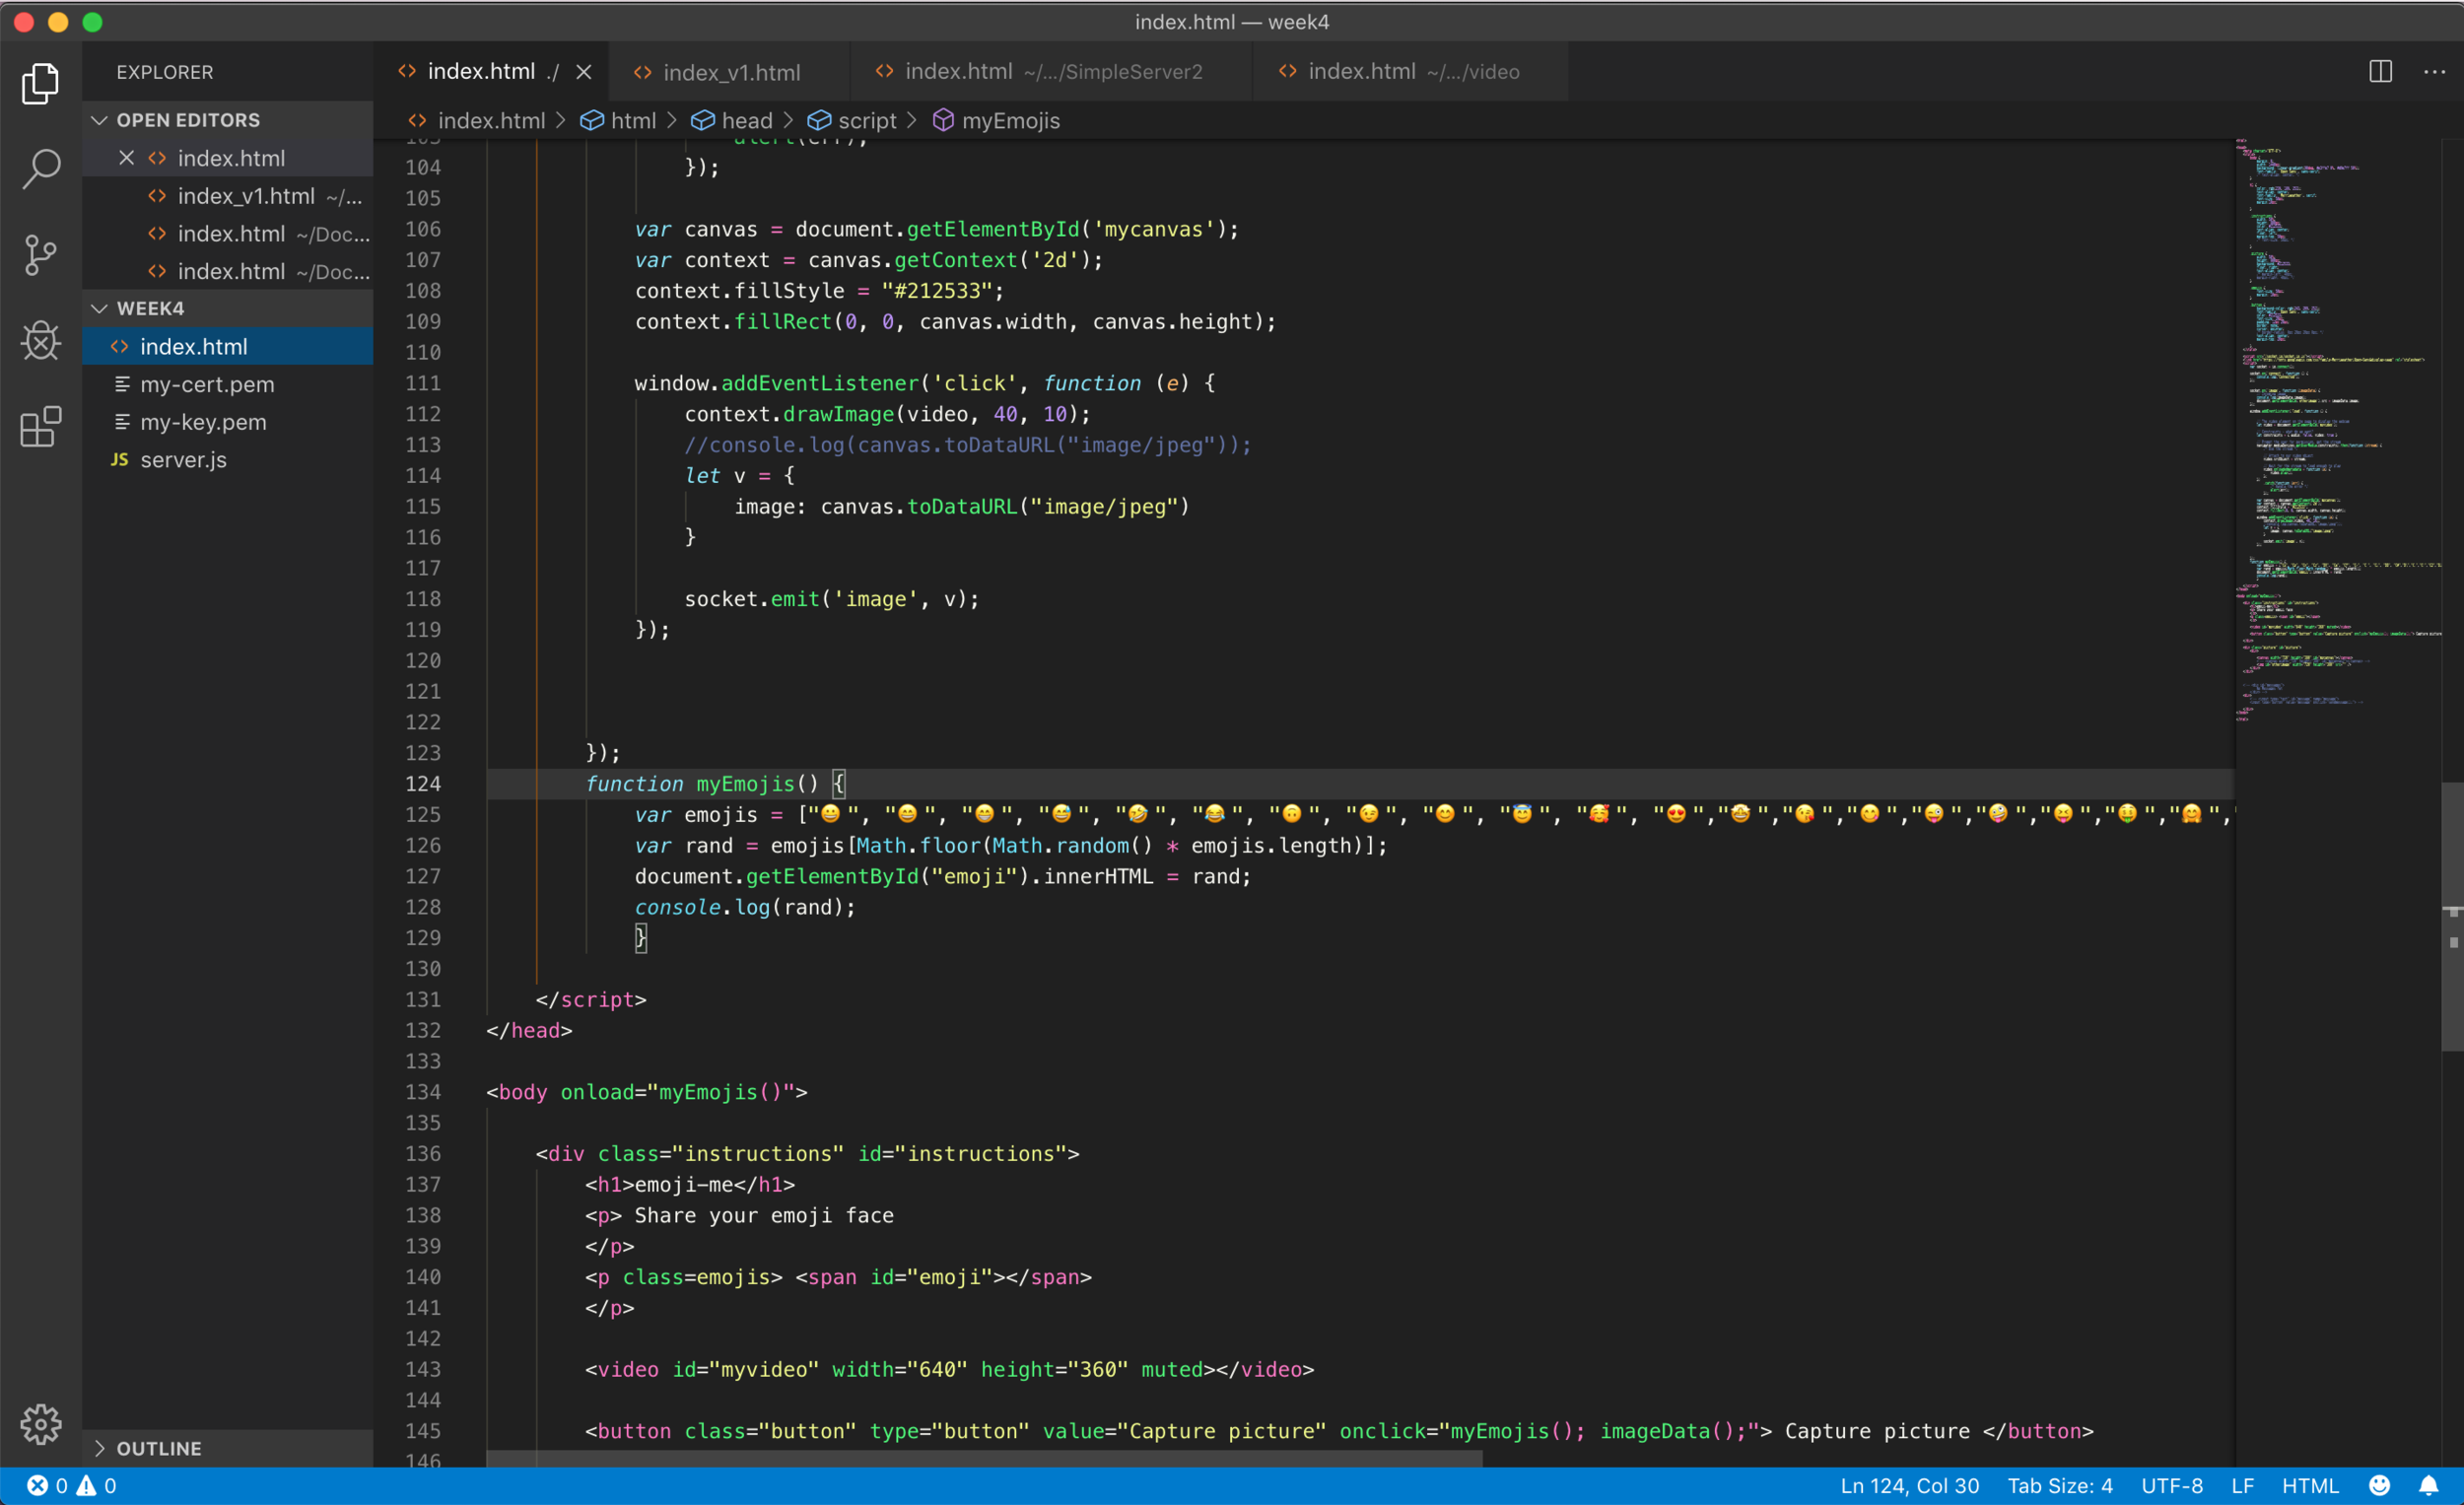
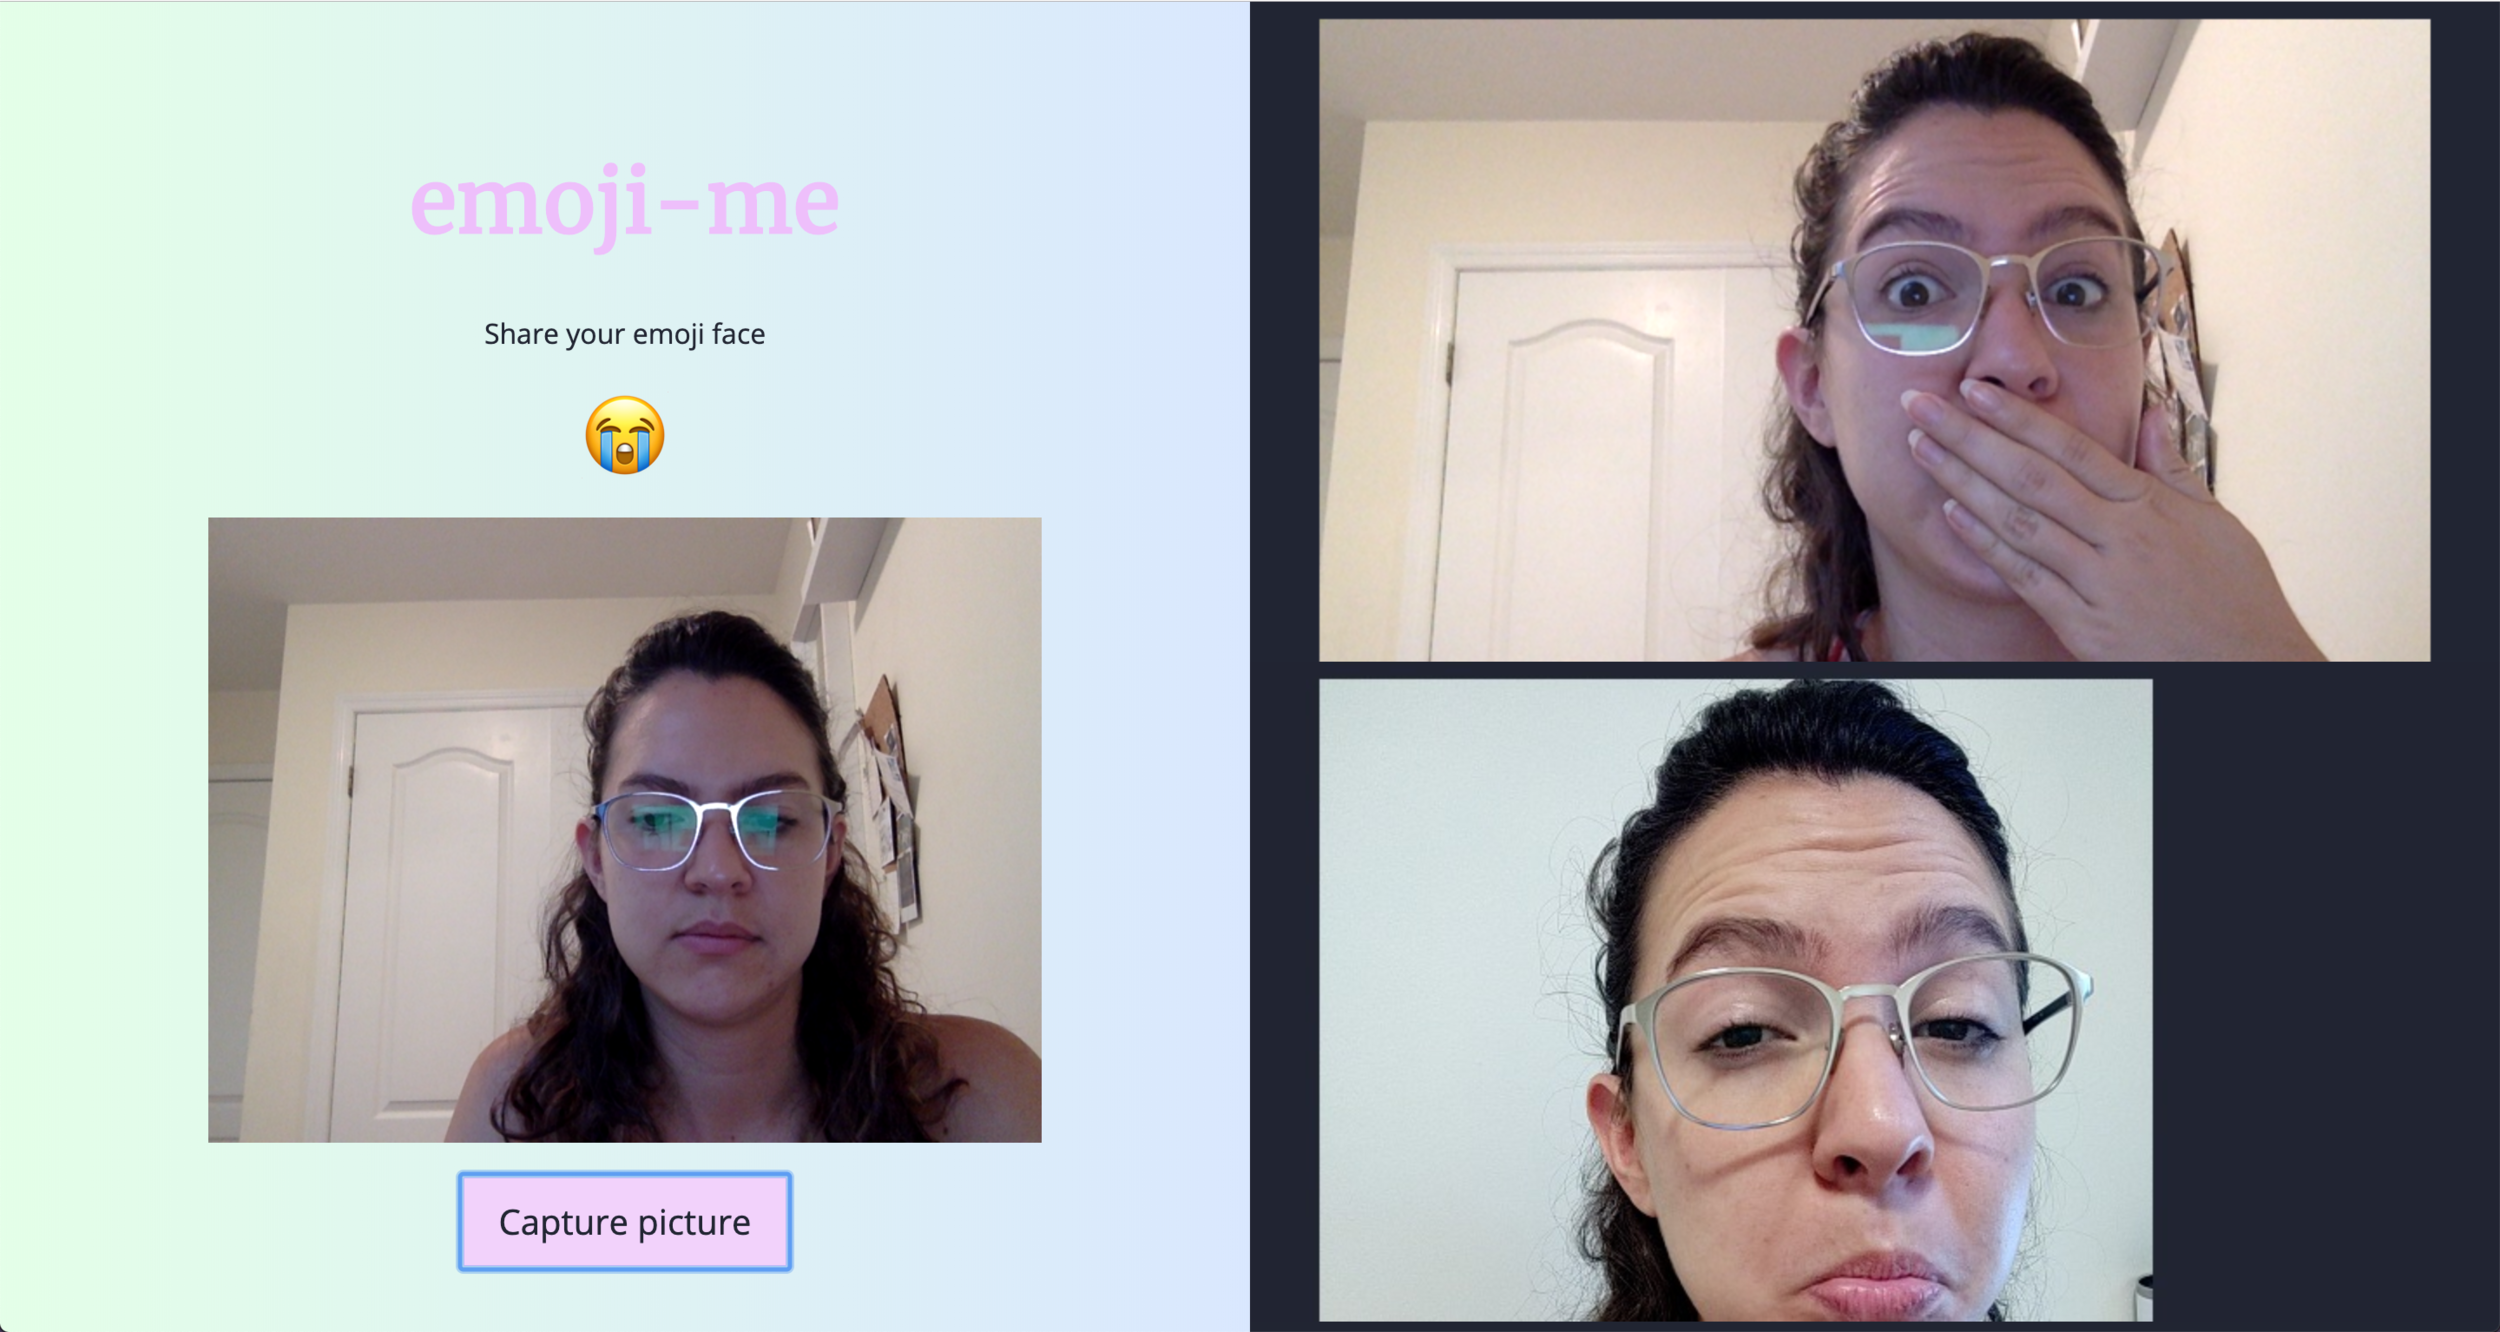
For my midterm assignment, I already started working around this idea of having a platform that will enable PT to guide their patients while they perform certain exercises. The main pain point that I would like to work on is the fact that patients lack motivation to perform their exercises, therefore, their condition gets worse over time.

I would like to create a platform in which the PT can track the progress of the user and have a way to motivate them by recording the videos of the first visits and be able to record short videos of their next appointments so that they can compare the progress over time.

This would be a continuation of my midterm assignment but this time I would like to be able to:

  1. Collect data about the exercises performed.

  2. Record short videos of the patient’s progress.

  3. Be able to have a more intuitive and user-friendly interface.

2. Stress ball with breathing exercises app

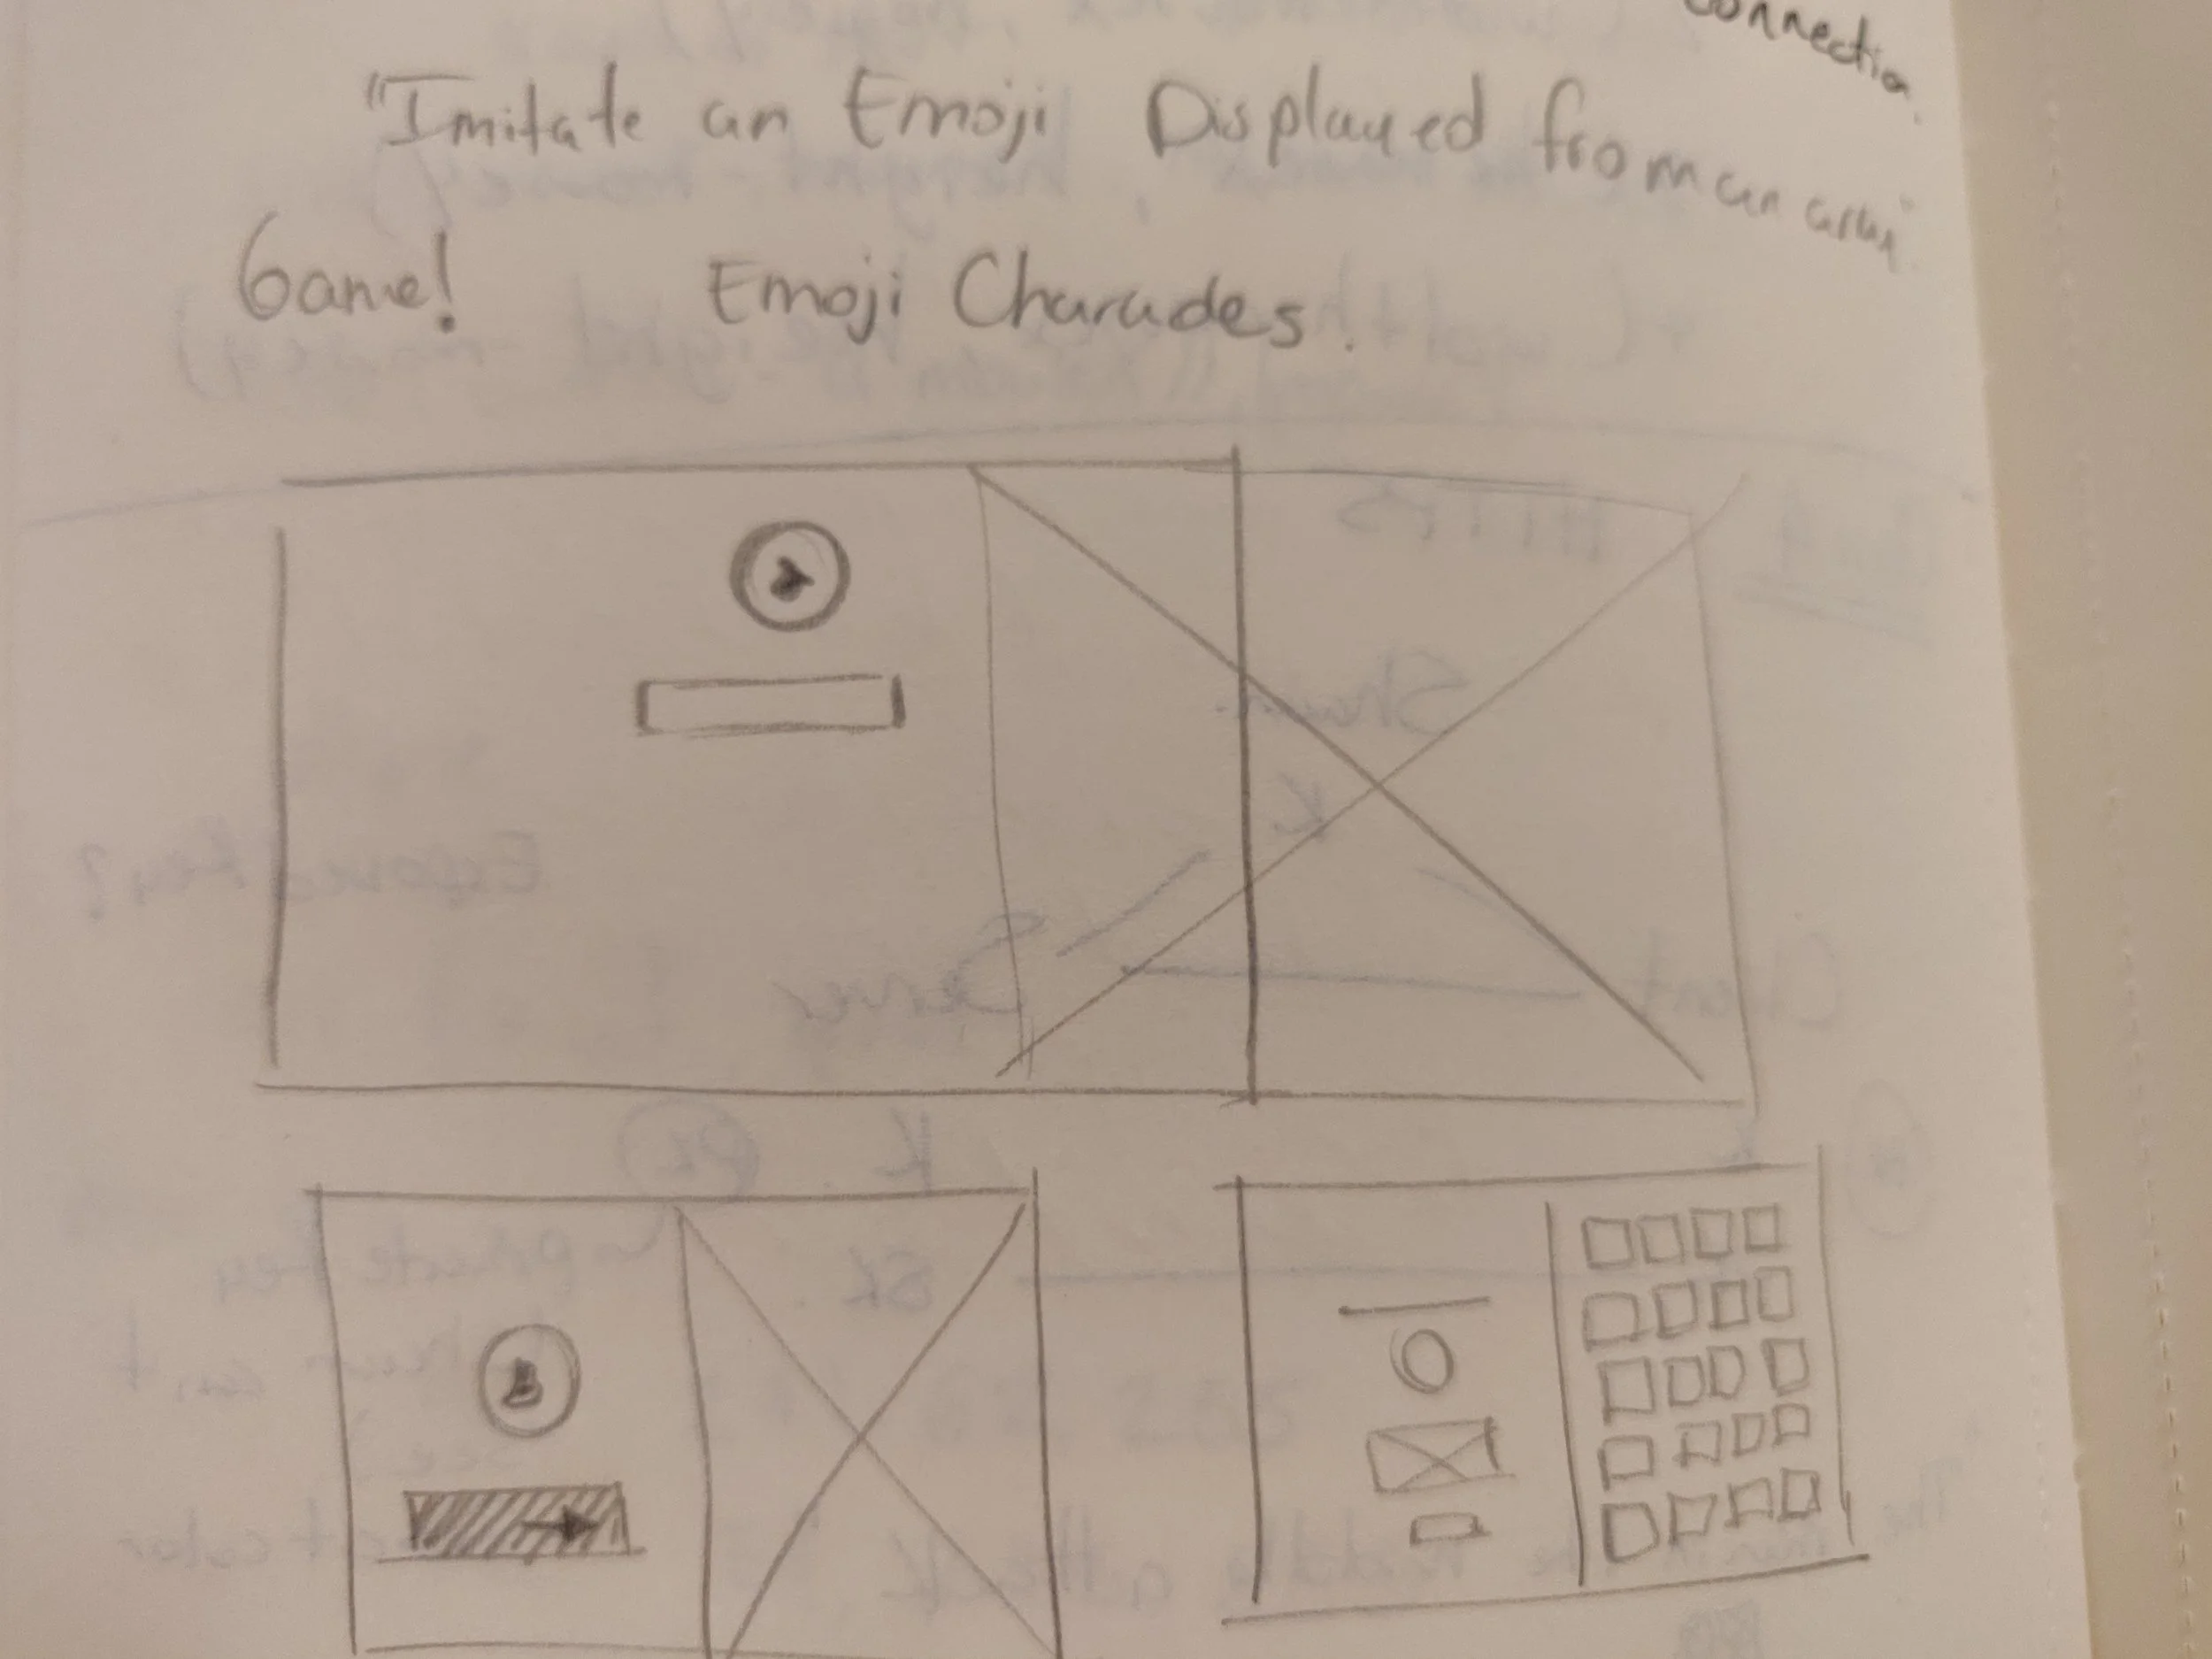
For my “Developing Assistive Technologies” class I am designing an element that can be placed in the NYU Oral Health Center for People with Disabilities who might have Anxiety/stress and/or Sensory Processing issues (Autism, ADHD, etc).

Purpose of the Device: Calming tactile interface for patients who are waiting for their oral procedures and their caregivers. This device will be portable so it can be used inside the multisensory room and also it will be possible to use in the waiting area as a way of inviting both patients and caregivers to use the multi-sensory room. The device will be designed to be placed in the lap of the user so it will be accessible to everyone including people in wheelchairs. 

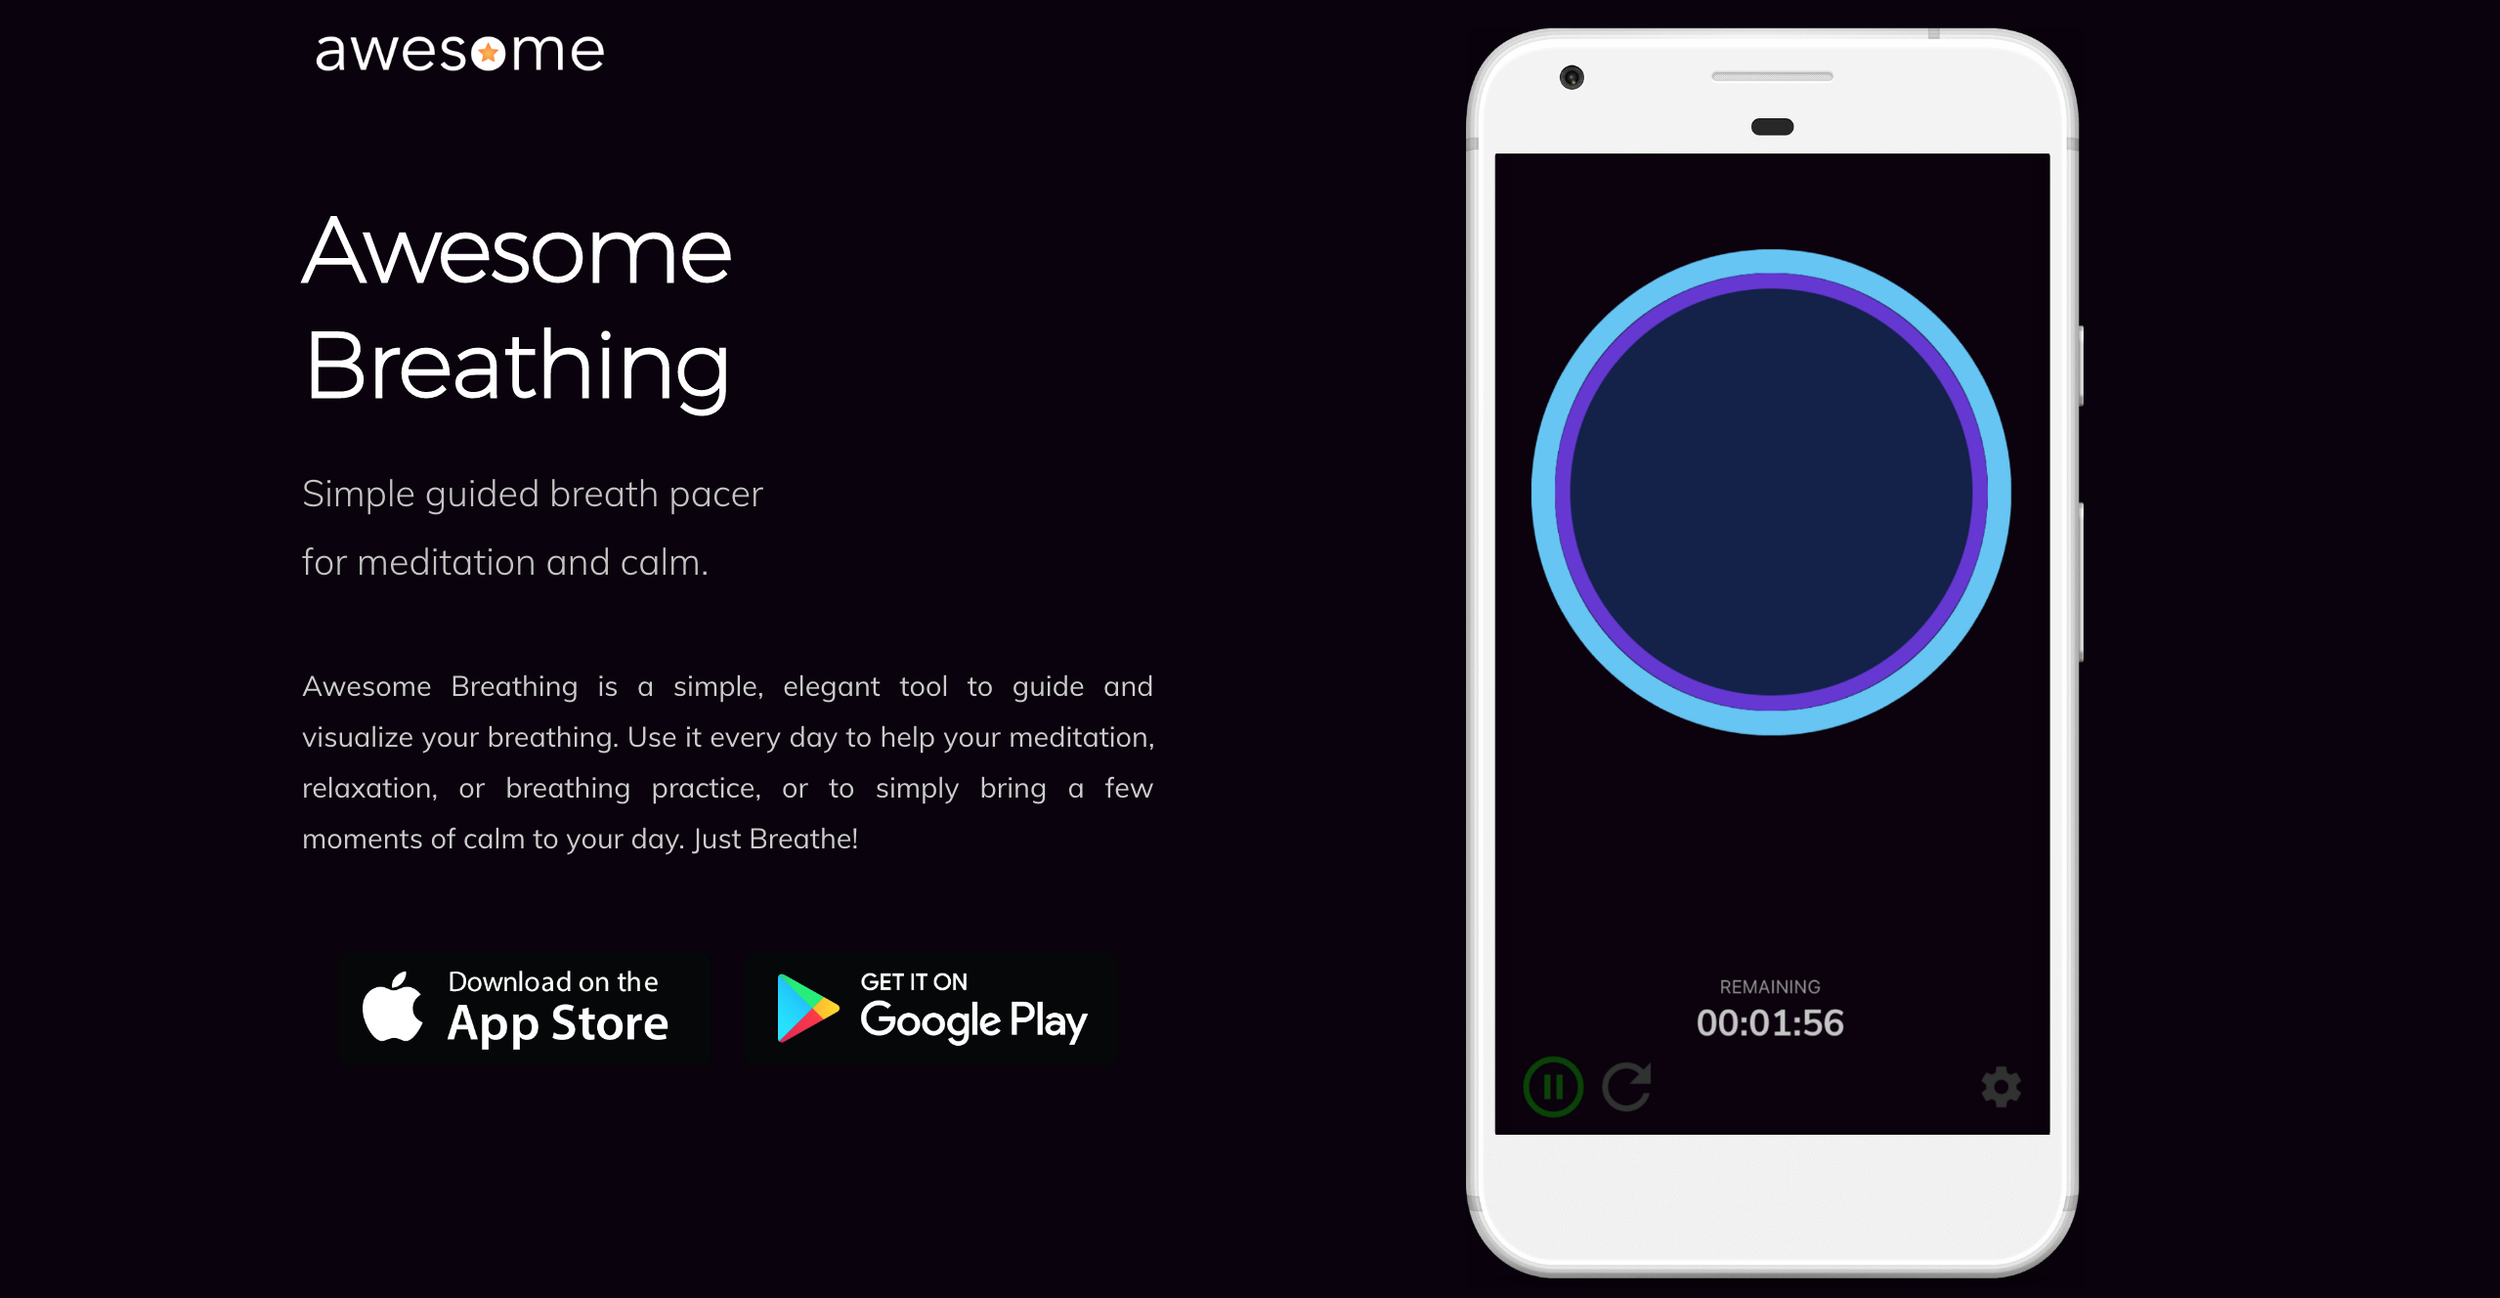
Live Web Portion: By doing user testing of the first prototype of the device I have received feedback that this device might benefit from some guidance for the user to calm down, I would like to connect the stress ball to a visual interface that will allow the patients (or a user with stress or anxiety) to follow breathing patterns.

The website will have a breathing pattern that will be shown with a circular relaxing pattern in the screen when the circle gets bigger is time for the user to inhale, when the circle gets smaller, it’s time to exhale. The pattern will be calming and the rate of the breathing will be slow so that the users can relax. At the same time that the breathing visuals are happening the user will be prompted to squeeze the ball, which is covered by resistive fabric, which sends values to Arduino, I will define a threshold so that when the ball is squeezed when inhaling, the visual interface will have an indicator that the user achieved the breathing correctly.

The following is a video of the way the first prototype is working:

As an inspiration I would like to use apps like Calm that guides the user to breathe in certain patterns, however this will have a tactile interface connected to the UI so that the user follows the breathing exercises with the squeeze interaction for the stress ball in order to calm them down.

Inspiration from Calm App

The following is a visual explanation on how the stress ball will be connected to the visual patterns in the screen:

Stress ball conncented to the computer

Stress ball conncented to the computer

Visuals interaction

Visuals interaction

Manipulating pixels and recording videos

For this section of the class, I decided to focus on being able to run the exercise developed in class and also start thinking on how the functionality to record videos is going to be incorporated in the continuation of my Midterm Assignment and also start preparing for the final.

I want to be able to understand the code more in-depth so I took the opportunity this class to code everything from scratch. The first test was an attempt to complete all the code from class and be able to save images and record videos from the canvas.

First test

First test

Once I was able to do that I started playing with the elements in the screen, the first step was to hide the non manipulated video so that the user could only see the video displayed in the canvas.

Hiding non manipulated video

Hiding non manipulated video

After I was able to successfully save the videos in the local server, I started to incorporate the UI that I have already stablished for my PT and Patient interface in the midterm in order to start visualizing how the PT could save a video for each of the exercises the patient is developing and be able to use them as a source of comparison and motivation for the patient to be able to visually understand the milestones in their recovery.

Implementing UI

Implementing UI

I envision being able to use the stored videos as a way to motivate patients and also a way for PT to keep track of their patient’s recovery.

Being able to save video files.

Being able to save video files.

Live Web Midterm Project | Road to Recovery

For my midterm assignment I decided to work on a platform that enables collaborative PT sessions for patients recovering from injuries. It enables the PT to teach the exercises and use RTC in order to track the quality of the exercises and quantify the ones that have been correctly performed by the patients.

The goal for this assignment in term of the technology used was to be able to use the peer.js library and websockets to send data to the patient side. My first attempt was to make the peer.js work with a different visualization for each side (PT and patient).

Midterm Proposal | face-to-face PT session

For my midterm assignment, I would like to explore the possibility of developing a technology that will enable patients to have their PT sessions remotely but having a collaborative and controlled environment as they have in the PT clinic.

There are a lot of apps out there that have tried to achieve this behavior however I would like to focus on setting milestones and for the patient to be able to do the exercises and receive motivation guidance and instructions in real time.

Virtual PT

Virtual PT

Physera

Physera

I am aware this might be a project to pursue for my final however I would like to start the exploration of the functionalities for my midterm.

Emoji-me

For this week’s assignment I decided to focus on understanding the code provided in class and to make simple changes in order to generate a concept around the functionalities that were already working in the example. I have found difficulties to both practice and understand the code and come up with a creative concept at the same time in a one week period of time.

I started by deciding to sketch some ideas out and then try to define the steps in the code that I needed in order to achieve that basic functionality. Defining my intentionality in design before I started to code was of huge help to prioritize in order to be able to finalize the project.

Wireframing and ideation process

Wireframing and ideation process

I decided to build a game-like platform for users to imitate the emoji faces that were being prompted to them and meanwhile the other users will also imitate the emoji faces and they would eventually be displayed in everyone’s screen. I started by creating the emoji function, every time that the user opens the page they would be prompted with a new emoji to try, however I was facing the problem that I wanted this interaction to happen multiple times, when the user take one picture then the system would display the next emoji and so on.

Testing some emoji faces

Testing some emoji faces

The emoji function

The emoji function

After I was able to implement the emoji functionality every time after the picture was captured, I divided the right side of the screen vertically with two pictures, the one on top will be the picture that each user is taking (socket.emit) and the picture in the button will be rotating with all the pictures received from different users that are connected to the server at the same time.

Final implementation

Final implementation

Creating our new screensaver together

For this weeks assignment I wanted to work on a collaborative way of creating a visual pattern, my main goal was to provide the users with the possibility of generating patterns that would be visually relaxing and interesting to create. I have been exploring mirroring the screen in 4 quadrants in order to generate those patterns.

My first test was to make sure that the other user (not me) would have a different color and that I was able to receive their movements and they would receive mines, I started by only generated one mirrored element (circle) which was also joint by the line, this was, of course, a mistake that I later tried to fix, however at this point I considered keeping the line in the middle.

Fist collaborative test

Fist collaborative test

It took some experimentation with the shapes and colors until I landed in a visual that I felt satisfied with. The way that I decided to handle different users is, I created two different arrays, one for the colors (which I previously defined in Adobe Illustrator to make sure that they compose a uniform palette and then I also created an array for different predetermined diameters for the drawings. I had to make sure that all the colors have transparency so that the effect in the screensaver will be better.

Color and diameter array

Color and diameter array

Color Palette

Color Palette

The next step in the process was to generate the 4 quadrants mirror functionality, which I had explore before in the past however I have to make sure that I could apply it to the html5 canvas element. I was able to remove the line in the center of the two circles and correctly mirror each circle in the 3 remaining quadrants.

Mirrored quadrants

Mirrored quadrants

Code for Quadrants

Code for Quadrants

The last part of the process was to test the creation of different visually interesting patterns with different users and how the collaboration will encourage users to generate their own drawings together.

Week 2: Chat

For this week assignment I worked on setting up a chat using web-sockets. The biggest challenge was to set everything up and running and after I was able to do so I decided to change the visualization and the content of the chat messaging board.

The first step was to make possible for a user that sent a text to see the content instead of just sending it and it disappearing.

Test 1: Make the sent message visible

Test 1: Make the sent message visible

The second step was to design a look and feel that was appropriate following some best practices, I decided to design it with “Dark mode” since it has been proven to be better for the eyes. I started the design process in sketch to be able to test color and size before implementing it in the code.

Design process using Sketch

Design process using Sketch

The next step was to try to implement the User Interface Design previously created in sketch. This was a very challenging part specially because the divs for “outgoing” and “incoming” messages were being generated from the chat, therefore the information architecture had to be generated from there. My biggest challenge, and the one that I wasn’t able to solve, was to be able to visualize each bubble of text to the left and to the right, according to outgoing and incoming, but occupying the entire width of the container div.

challenge

The final result is a compliment chat that invites the users to give an anonymous compliment to the users in the connected users.

Live Web Assignment 1: Self Portrait

For this week’s assignment the main goal was to practice “add event listener” and “get element by id” by creating a self portrait with video and audio implementation in javascript. I started the process by finding a video that would represent myself in a good way and the project evolved from there.

The first functionality that I focused on was to be able to play the video on the screen, and I added a button to play and pause with toggle functionality. After I was able to implement those interactions I decided to try to change the text that was being displayed on the button, this was for sure the most difficult part of the assignment because I had to do research in many different elements that I wasn’t used to implement.

The next step was to apply some styles using css, I didn’t want to invest too much time on that because I wanted to focus on practicing more javascript therefore the visual components are simple.

Moreover, I wanted to find a way to only show the video when the button was pressed and change the background image when the video was playing and at the same time enable the functionality to hide the video and the background image, but making sure that the video was paused while it was hidden.

The final result is a self portrait that demonstrates in a very accurate way how happy I get whenever I have ice cream in my hands.

Code documentation: